Customizing Camera Raw Defaults in Lightroom Classic

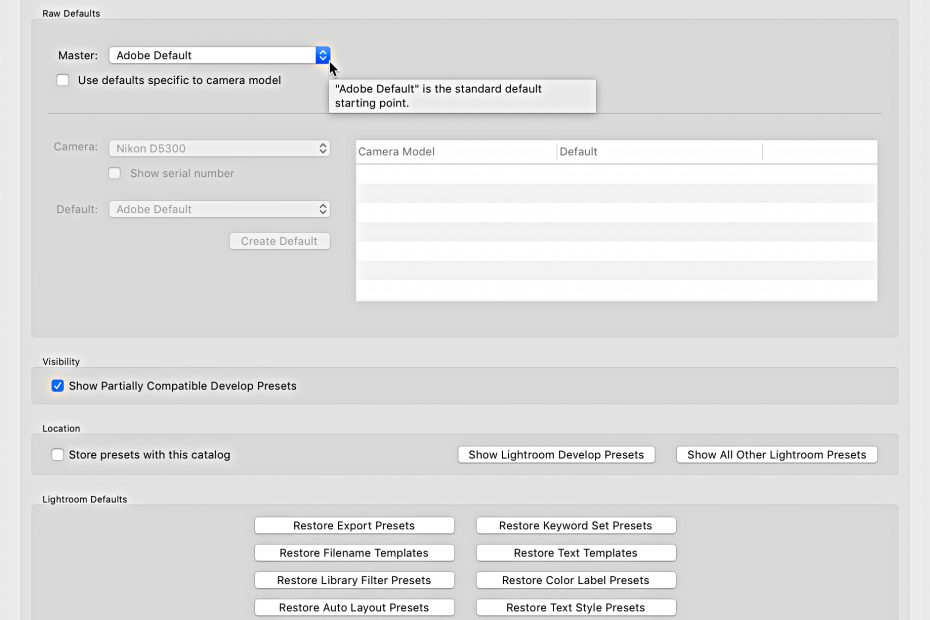
Forget everything you knew about how to create a custom default setting for your raw photos, and let’s get up to speed on the new system. Once you install the 9.2 update your old custom default settings will not work on newly imported photos or when… Read More »Customizing Camera Raw Defaults in Lightroom Classic